

Last Updated: October 26, 2026
Quick Summary
Clean vintage vinyl records by first removing loose dust with an anti-static brush, then applying a light mist of vinyl record cleaning solution to a microfibre cloth and wiping gently in circular motions from centre outward. Dry the record upright at room temperature for at least 30 minutes, then inspect and play a test passage to verify the cleaning improved sound quality.
- Use distilled water only, never tap water, which leaves mineral deposits that trap dirt and create crackling sounds.
- An anti-static brush is essential because regular brushes generate static electricity that attracts dust back onto the record immediately.
- Microfibre cloth is required because cotton and paper towels shed fibres that lodge in grooves and create noise.
- Air dry records upright for at least 30 minutes at room temperature; laying them flat traps fluid and encourages warping.
- Records with cracks, severe warps, flaking labels, or high historical value should be referred to a professional cleaning service instead.
Table of Contents
- Why Cleaning Vintage Vinyl Records Matters
- What You'll Need Before You Start
- Assessing Your Record's Condition First
- Step 1: Remove Loose Dust with an Anti-Static Brush
- Step 2: Choose the Right Vinyl Record Cleaning Solution
- Step 3: Wet Clean with a Microfibre Cloth
- Step 4: How to Dry Vinyl Records Properly
- What Not to Use to Clean Vinyl Records
- Frequently Asked Questions
Why Cleaning Vintage Vinyl Records Matters
Dust and debris destroy vinyl records. Every speck sitting in the grooves creates surface noise, distorts your music, and accelerates wear. Clean vinyl sounds noticeably better. It also lasts longer.
A rare pressing deserves proper care. The difference between a neglected record and a maintained one is audible, and measurable in longevity.
Clean vintage vinyl records face unique challenges. They've accumulated decades of dust, fingerprints, and oxidation. Some have been stored poorly. Others arrived from estate sales or second-hand collections. Before you play a vintage record, cleaning it isn't optional, it's essential maintenance.
The good news: cleaning vintage vinyl records is straightforward when you follow the right steps. You don't need expensive equipment. You need the right technique and materials.
What You'll Need Before You Start
Gather these items before you begin:
- Anti-static brush, removes loose dust without creating static charge
- Microfibre cloth, soft, non-abrasive, lint-free
- Distilled water, prevents mineral deposits that tap water leaves behind
- Vinyl record cleaning solution, formulated specifically for records
- Spray bottle, for applying cleaner evenly
- Clean, dry towel, for final drying
Avoid paper towels. They shed fibres and scratch the surface. Never use tap water, minerals in it leave residue that traps dirt. Skip household cleaners entirely. They contain ingredients that damage vinyl.
The anti-static brush is crucial. Standard brushes build up static electricity, which attracts dust right back onto your record. An anti-static brush dissipates charge as it works.
Assessing Your Record's Condition First
Before any brush or fluid touches a vintage record, spend two minutes grading it. Age alone does not determine the safest method; condition and history do. Work through the checks below in order and record what you find, because the result decides whether you dry brush, hand wash, or stop entirely.
1. Inspect under strong, angled light. Hold the record at eye level and tilt it so light rakes across the grooves.
2. Check for structural problems. Run a fingertip lightly around the outer edge and look across the surface at a low angle. A record that is visibly dished, has a pronounced warp, or shows a crack running from the edge inward is a stop condition.
3. Test the label. Vintage labels are paper and can be more fragile than the vinyl. Gently press a corner of the label with a dry finger. If the paper lifts, flakes, or feels tacky, treat the record as label-fragile: no sprays, no wet wiping near the centre, dry methods only.
5. Consider provenance and value. Records from estate sales, damp garages, or unknown storage may carry residues from past treatments: silicone sprays, household polish, or abrasive pastes. These can be invisible but chemically bonded to the groove.
6. Establish a playback baseline. Play 15 to 20 seconds of a quiet passage and a loud passage before cleaning. Note clicks, crackle, distortion, and any repeating tick. This baseline is how you will judge whether cleaning helped or whether the noise is physical wear that no cleaning can remove.
Use the findings to choose a method rather than defaulting to a full wet clean:
| Condition found | Safest method | Avoid |
|---|---|---|
| Light surface dust, no visible residue | Dry anti-static brush only | Wet cleaning, which adds unnecessary moisture risk |
| Fingerprints, oily film, audible crackle that improves after dry brushing | Hand wash with distilled water and record solution | Soaking, tap water, household cleaners |
| Heavy ingrained soil, repeated wet cleaning has not helped | Vacuum record-cleaning machine, or professional service | Repeated hand washing, which increases handling risk |
| Mold, flaking label, crack, severe warp, high-value or historic pressing | Stop; isolate or refer to a professional | Any home wet cleaning |
Step 1: Remove Loose Dust with an Anti-Static Brush
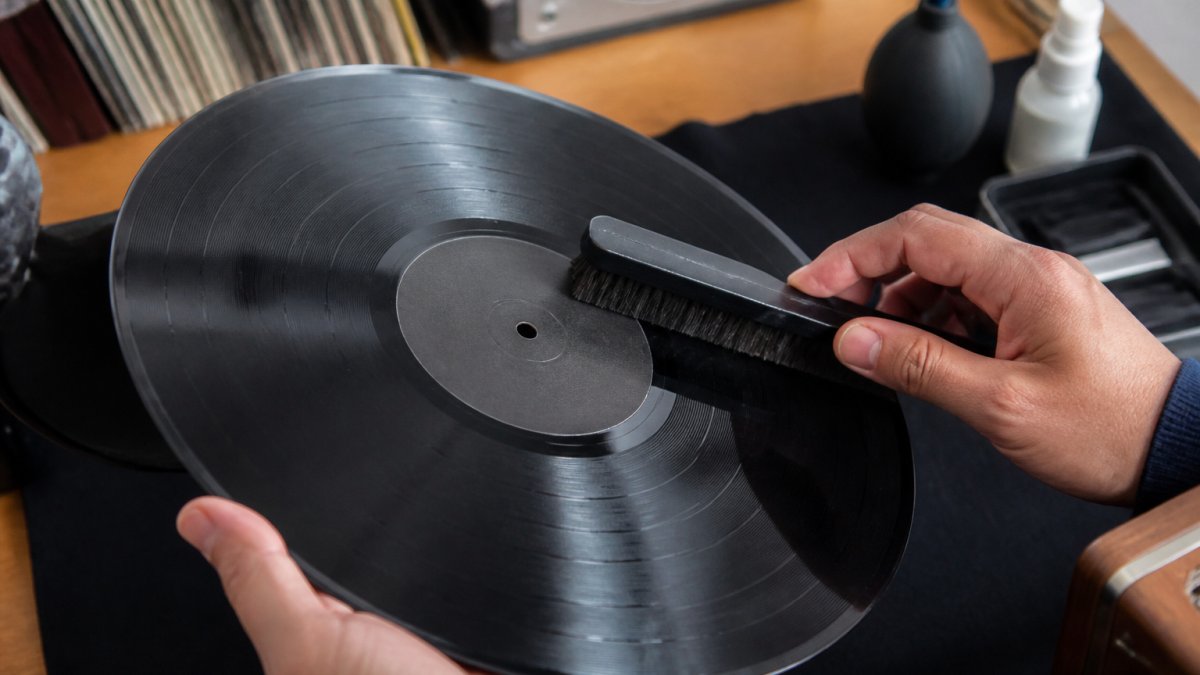
The anti-static brush works because it neutralises the charge that makes dust cling to vinyl. A regular brush creates static, which actually attracts more dust. That's why this step matters, you're not just removing dirt, you're preventing it from returning immediately.
Step 2: Choose the Right Vinyl Record Cleaning Solution
Not all cleaners are equal. Vinyl record cleaning solution formulated for records is different from household cleaners.
A proper vinyl record cleaning solution contains:
- Distilled water as the base
- Mild surfactants to lift oils and dirt
- Anti-static agents to prevent charge buildup
- No harsh chemicals, alcohol, or abrasives
Some collectors debate ingredients. Isopropyl alcohol appears in some recipes, but it can dry out vinyl over time. Dishwashing detergent is tempting because it's cheap, but it leaves residue and can degrade the record's surface. The safest choice is a cleaner formulated specifically for vinyl records.
Mix or purchase pre-mixed cleaning solution. If mixing your own, use distilled water only. Tap water contains minerals that leave white deposits on the record. These deposits trap dirt and create noise.
Apply the solution with a spray bottle. A light mist is all you need. Oversaturation risks liquid seeping under the label or into the record's core, causing warping or mold.
Step 3: Wet Clean with a Microfibre Cloth
After removing loose dust, apply your cleaning solution lightly to the record.
Spray a fine mist onto the microfibre cloth, not directly onto the record. This gives you better control. Overspraying causes pooling, which leads to problems.
Wipe the record gently in circular motions, following the groove direction. Work from centre outward. Use light pressure. The cloth should glide, not scrub. Flip the record and repeat on the other side.
Microfibre cloth matters because it doesn't shed. Cotton or paper towels leave lint in the grooves, which becomes trapped and creates noise. Microfibre is designed to capture particles without leaving residue.
A common mistake is applying too much cleaner. You need just enough to lift oils and dirt. Excess liquid risks seeping into the label or the record's interior, causing damage. One light application is better than multiple heavy ones.
Step 4: How to Dry Vinyl Records Properly
Drying is where many home cleans fail. Residual moisture attracts dust, feeds mold, and can wick into the label or the record's core. Treat drying as a controlled step with a check at the end, not a quick wipe.
Remove bulk moisture first. Use a clean, dry microfibre cloth and wipe gently in circular motions following the groove direction, working from the centre outward. Use a fresh face of the cloth for each side so you are not redistributing what you just lifted.
Air dry upright, never flat. Stand the record on its edge in a drying rack or against a clean, dry surface with the grooves vertical. Laying a wet record flat traps fluid against the surface and encourages warping.
Keep heat and airflow gentle. Do not use a hair dryer, heater, or direct sun. Vinyl softens and warps well below the temperatures those sources produce. Room-temperature air is the safe ceiling.
Inspect before you play. Hold the dry record up to a light at an angle and look for three things: remaining streaks or haze (residue), lint or fibres (cloth or sleeve contamination), and any new marks that were not there before cleaning. A clean record should look uniformly dark and reflective with no cloudy patches. If you see haze, repeat one light wet pass rather than scrubbing harder.
Verify with a playback check. This is the step most guides skip. Play the same 15 to 20 seconds you used as your baseline before cleaning.
Log the result. Note the date, method, and outcome for each record. Over time this tells you which records need annual dry brushing and which need wet cleaning more often, and it prevents over-cleaning records that are already in good condition.
What Not to Use to Clean Vinyl Records
Some methods sound reasonable but damage vinyl. Avoid these entirely.
Never use tap water. It contains minerals and chlorine that leave deposits. These deposits trap dirt and create crackling sounds. Distilled water only.
Skip household cleaners. Products designed for surfaces contain harsh chemicals. Glass cleaner, furniture polish, and all-purpose cleaners leave residue that degrades sound quality and damages the record's surface over time.
Avoid paper towels and cotton cloths. They shed fibres that lodge in the grooves. These fibres create noise and are nearly impossible to remove completely.
Don't use standard brushes. Regular brushes generate static electricity, which attracts dust back onto the record immediately after you remove it. An anti-static brush is essential.
Never soak records. Submerging a record risks water seeping under the label and into the core. This causes warping, mold, and permanent damage.
Skip abrasive pads or scrubbing. Aggressive cleaning damages the groove walls and accelerates wear. Gentle wiping is all vinyl needs.
Avoid record-cleaning machines if you're unsure. Vacuum-based machines are effective but require proper technique. If you're new to cleaning, stick with hand cleaning first. Once you're confident, machines can be a next step.
Don't use isopropyl alcohol unless it's in a commercial vinyl cleaner. Pure alcohol can dry out vinyl and cause cracking over time.
Explore our curated selection of rare and underground pressings.
| Step | Time | Frequency | Key Tool |
|---|---|---|---|
| Dry brush removal | 2 minutes | Before first play, then annually | Anti-static brush |
| Wet cleaning | 5 minutes | As needed for visible dirt | Microfibre cloth + cleaning solution |
| Drying | 3 minutes | After every wet clean | Clean microfibre cloth |
| Air dry | 30 minutes | After every wet clean | Drying rack or upright storage |
Frequently Asked Questions
Is it safe to clean vintage vinyl records with water?
Yes, distilled water is safe for cleaning vintage vinyl records when used correctly. The key is using distilled water rather than tap water, which contains minerals that can leave residue and damage the grooves. Always dampen a microfibre cloth with distilled water rather than spraying water directly on the record. Work gently along the groove direction, and dry thoroughly immediately after cleaning. Avoid soaking the label area, as excess moisture can damage the adhesive and cause warping.
What is the best homemade vinyl record cleaning solution?
A simple mixture of distilled water with a tiny drop of mild dishwashing detergent works well for most records. Mix approximately one part detergent to one hundred parts distilled water, the solution should be barely soapy. Some collectors prefer pure distilled water alone for lightly soiled records. Avoid household cleaners, vinegar, or alcohol-based solutions, as these can damage the vinyl. Always test any solution on an inconspicuous area first, and rinse thoroughly with clean distilled water after cleaning.
How often should you clean vintage vinyl records?
Clean vintage vinyl records only when necessary, typically before playing them after storage or when you notice visible dust or surface noise. Over-cleaning can wear the grooves prematurely. Records stored in proper sleeves and handled by the edges may need cleaning only once or twice yearly. Records exposed to dust, smoke, or stored in poor conditions may require more frequent cleaning. Always inspect the record under good light before deciding whether cleaning is needed.
What should you not clean vinyl records with?
Never use WD-40, household cleaners, vinegar, rubbing alcohol, paper towels, or abrasive brushes on vinyl records. Avoid tap water, which contains minerals that leave residue. Do not use commercial furniture polish, acetone, or solvents. Stay away from rough cloths or tissues that can scratch the surface. Never spray liquid directly onto records or soak them. Avoid vigorous scrubbing motions, and do not clean the label area aggressively. These materials and methods can permanently damage the grooves, degrade sound quality, or cause warping.
